


Before you start
In the 3x3 blindfolded event (BLD for short), the clock starts the moment you first see the scrambled cube. You look at it and memorise it, then put on the blindfold and solve from memory. You stop the timer once the cube is solved - what counts is the combined time of memorisation and solving. If the cube is not solved when you take off the blindfold, the attempt is unsuccessful (DNF). At WCA competitions everyone usually gets three attempts, and the best one counts.
What you need to know
- how to solve a 3x3 cube with any method - then you know how edges and corners behave,
- how to read move notation (R, U', F2…) - if you don't know it yet, have a look at the 3x3 beginner course.
You don't need to solve fast or know advanced methods. In blindfolded solving, accuracy is what matters: a single move in the wrong direction ruins the whole solve.
How it works
We teach the Old Pochmann method - the simplest blindfolded method. It is slow (about 350-400 moves for the whole cube), but everything in it works the same way:
- One position on the cube is the buffer. You swap the piece in the buffer with the position where that piece belongs. Then the next piece lands in the buffer - and you repeat.
- Every sticker has a letter. You only memorise a string of letters: the successive positions the buffer piece has to be sent to.
- The swap is always done by the same algorithm. To make it work for any letter, you first use a short setup (1-3 moves) to bring the right position into one fixed spot, do the algorithm and undo the setup.
First you solve all the edges this way, then all the corners. Solved pieces stay in place, because you undo every setup after the algorithm.
How to hold the cube
Throughout the course you hold the cube with the white centre on top and green in front - the same as when scrambling at competitions. During memorisation you can look at it from all sides, but before covering your eyes go back to this orientation and don't rotate the whole cube after that.
New moves
The setups use moves you may not have used before: l is the left face together with the middle layer (like L, just two layers), d is the bottom face together with the middle layer (like D, two layers), and M is just the middle layer between L and R, turned like L.
1Letters on the stickers
Goal: for every edge and corner sticker you instantly know which letter it is.
Edges have 24 stickers, and corners have 24 too - so each group gets the letters A to X. The same letter therefore stands for one edge sticker and one corner sticker, but you can't mix them up: you trace edges and corners separately. Centres have no letters.
We use the most popular scheme, Speffz. The faces get their letters in this order: U (white) A-D, L (orange) E-H, F (green) I-L, R (red) M-P, B (blue) Q-T and D (yellow) U-X. On each face the letters go clockwise: corners starting from the top-left corner, edges starting from the top edge. The faces are viewed as on the net below: the side faces with white on top, the white face with blue on top, and the yellow face with green on top.
Letters from colours
On a scrambled cube you read the letters from the colours of the piece - as if it were already sitting in its solved position:
- the sticker's colour tells you which face it belongs on (a green sticker = face F, letters I-L),
- the piece's other colours tell you which edge or which corner of that face (a green edge sticker with white next to it = the top edge of face F = I).
Another example: a red corner sticker whose other colours are white and green - it belongs on face R, in the corner next to white and green, i.e. the top-left corner of face R = M.
Practise
Learn one face at a time, then test yourself here until every letter comes instantly, without counting. This is the most important stage - the speed and accuracy of everything else depend on it.
2Three algorithms
Goal: three algorithms you can execute confidently without looking at the cube.
T-perm and Ra-perm are PLL algorithms from the CFOP method - if you know them, only the modified Y-perm is left. Each one swaps two edges and two corners. Practise them until you can do each one with your eyes closed and get back to a solved cube every time - when solving blindfolded you won't see a mistake.
The modified Y-perm is a regular Y-perm (F R U' R' U' R U R' F' R U R' U' R' F R F') without the first and last move - that is why it swaps a corner from the bottom rather than from the top.
What about the extra swap? As a side effect, T-perm swaps the two right corners of the top layer, and Y-perm swaps the two edges UB and UL. When you do an algorithm twice, this extra swap cancels out. So with an even number of letters everything goes back into place by itself, and with an odd number Ra-perm helps (stage 7).
3Tracing edges
Goal: you read the string of edge letters from a scrambled cube without turning its layers.
The edge buffer is UR - the right edge of the top face. You look at its top sticker (this position has the letter B):
- Work out from the colours which letter it is - that is the position where this piece belongs. Memorise it.
- Find that position on the cube and read the letter of the sticker currently sitting there. That is the next letter: the piece knocked out of that position will land in the buffer and has to be sent on too.
- Repeat until you get back to the buffer piece (the colours of the UR edge: white and red).
Group the letters into pairs - that makes them easier to memorise later. Edges that are already correctly in place are skipped.
Cycle break
Sometimes the buffer piece returns to the buffer before you have visited all the unsolved edges. Then pick any edge that is not yet in place, note the letter of one of its stickers and keep tracing from that position. This new cycle ends when you get back to the chosen edge - you note its letter too (the same sticker or the other one).
A flipped edge in its own position is the shortest such cycle: you note both of its letters, e.g. K U for the DF edge with green on the bottom.
You usually end up with 10-14 edge letters. The letters B and M (the buffer) never go into the memo.
4Edges: execution
Goal: for each edge letter you do the setup, T-perm and undo the setup.
T-perm swaps the buffer with position D (the left edge of the top layer). The setup brings the sticker of your letter exactly to position D - then T-perm sends the buffer piece where it needs to go. Then you undo the setup: the same moves in reverse order, each in the opposite direction.
The setups use only the moves L, D, l and d. They don't disturb the UR buffer or the two corners that T-perm moves. Never use U, R, F or B in a setup.
| Letter | Sticker | Setup | Undo | |
|---|---|---|---|---|
| A | UB | l2 D' L2 | L2 D l2 | |
| C | UF | l2 D L2 | L2 D' l2 | |
| D | UL | - (T-perm straight away) | - | |
| E | LU | L d' L | L' d L' | |
| F | LF | d' L | L' d | |
| G | LD | L d L' | L d' L' | |
| H | LB | d L' | L d' | |
| I | FU | l D' L2 | L2 D l' | |
| J | FR | d2 L | L' d2 | |
| K | FD | l D L2 | L2 D' l' | |
| L | FL | L' | L | |
| N | RB | d L | L' d' | |
| O | RD | D2 L d L' | L d' L' D2 | |
| P | RF | d' L' | L d | |
| Q | BU | l' D L2 | L2 D' l | |
| R | BL | L | L' | |
| S | BD | l' D' L2 | L2 D l | |
| T | BR | d2 L' | L d2 | |
| U | DF | D' L2 | L2 D | |
| V | DR | D2 L2 | L2 D2 | |
| W | DB | D L2 | L2 D' | |
| X | DL | L2 | L2 |
You don't have to learn the table by heart - the setups follow a few rules:
- stickers on face L (E, F, G, H) and next to it (J, L, N, P, R, T) reach D with one or two L and d moves,
- stickers on the bottom face (U, V, W, X) are turned with a D move to position X, then L2,
- edges of the middle layer on the top and bottom (A, C, I, K, Q, S) are moved down with l, and then handled like the bottom ones,
- O (the right edge on the bottom, red sticker) is the only one that needs four moves: D2 turns it into G.
5Tracing corners
Goal: a string of corner letters, read the same way as the edges.
The corner buffer is UBL - the back-left corner of the top face. You look at its top sticker (position A), read the letter and keep tracing exactly as with the edges. The buffer piece is white, orange and blue - its letters A, E and R never go into the memo.
A corner has three stickers, so you always read the letter of the sticker sitting in the position you have just reached. A cycle break works the same way: when the buffer's own piece returns to the buffer and something is still unsolved, note the letter of any unsolved corner and trace from there. A twisted corner in its own position gives two letters of the same corner, e.g. B N.
You usually get 7-10 corner letters.
6Corners: execution
Goal: for each corner letter you do the setup, the modified Y-perm and the undo.
The modified Y-perm swaps the buffer with position P - the right sticker of the DFR corner (the front-right corner on the bottom). The setup brings your letter to P. You use only the moves R, D and F - they don't disturb the buffer or the edges that Y-perm moves.
| Letter | Sticker | Setup | Undo | |
|---|---|---|---|---|
| B | UBR | R D' | D R' | |
| C | UFR | F | F' | |
| D | UFL | F R' | R F' | |
| F | LUF | F2 | F2 | |
| G | LDF | D2 R | R' D2 | |
| H | LDB | D2 | D2 | |
| I | FUL | F' D | D' F | |
| J | FUR | R2 D' | D R2 | |
| K | FDR | F D | D' F' | |
| L | FDL | D | D' | |
| M | RUF | R' | R | |
| N | RUB | R2 | R2 | |
| O | RDB | R | R' | |
| P | RDF | - (Y-perm straight away) | - | |
| Q | BUR | R' F | F' R | |
| S | BDL | D' R | R' D | |
| T | BDR | D' | D | |
| U | DFL | F' | F | |
| V | DFR | D' F' | F D | |
| W | DBR | D2 F' | F D2 | |
| X | DBL | D F' | F D' |
Rules that help you remember the table:
- face R: R, R2 or R' brings O, N and M to P,
- bottom face (U, V, W, X): a D move puts the sticker on U, then F',
- side stickers on the bottom (G, H, L, S, T) first travel with a D move to O or P (from O add R),
- K is the same corner as P, just a different sticker: F D,
- letters from the top layer (B, C, D, F, I, J, Q) go down with one or two moves.
7Parity
Goal: you know when to do Ra-perm, and you do it between the edges and the corners.
Roughly every other scramble has an odd number of edge letters. Then the number of corner letters is odd too - that is how the cube is built. In that case, after the edges T-perm leaves the two right corners of the top layer swapped, and at the end Y-perm would leave the UB and UL edges swapped.
The solution: after the last edge letter and before the first corner letter, do Ra-perm once:
R U R' F' R U2 R' U2 R' F R U R U2 R' U'
Ra-perm puts the two corners back in place (so you trace the corners normally, as if nothing had happened) and swaps the UB and UL edges, which the odd number of Y-perms will swap back.
Example: edges JH KQ DI FG OT W (11 letters) and corners FN UJ HP O (7 letters). Order: 11 edge letters, Ra-perm, 7 corner letters. A last letter without a pair is the signal to remember parity.
8Memorising the letters
Goal: about 20 letters that you remember reliably for several minutes of solving.
A string like NJQLKDVCHW is easy to lose. It helps to turn each letter pair into an image - a word that starts with those two letters (a vowel may come between them). Ideally something easy to picture:
- KR - karate, BL - balloon, TR - tractor, GR - grapes, ST - star, PL - plane,
- PA - parrot, KO - koala, LM - lemon, MR - mirror, DW - dwarf.
From the images you build a short story: a karate fighter (KR) kicks a balloon (BL), which lands on a tractor (TR)… The weirder it is, the better it sticks. Letters such as Q, V and X rarely start words - give them fixed associations, e.g. Q as a queen, V as a vampire, X as the crosses on a treasure map. After a few weeks of practice most pairs already have their images and a story comes together in a dozen or so seconds.
- Memorise the edges first, then the corners - and before putting on the blindfold, go over the whole thing once more in your head.
- For corners, at the start it is also enough to repeat the letters themselves in your head like a rhythm (“GM-SB-ND-VI”) - there are fewer of them.
- A single letter at the end of the edges means parity - memorise it as a separate image at the end of the story.
- Don't rush memorisation. At the start, 3-5 minutes is a normal time, and reliable memory matters more than fast memory.
9Your first blindfolded solve
Goal: your first successful solve with your eyes covered.
Don't start with the blindfold straight away. Go through three steps:
- With your eyes open. Trace the letters, write them on a piece of paper and execute them while looking at the cube. After each letter check that the buffer holds the next letter of the memo. This way you'll catch mistakes in the setups and algorithms.
- From memory, but looking. No paper: memorise the letters and execute them from memory, still looking at the cube.
- Blindfolded. First only the edges or only the corners (modes in the simulator below), then the whole cube.
The solve itself looks like this:
- Take the scrambled cube with white on top and green in front, start the timer.
- Trace and memorise the edges, then the corners. Count whether the number of edge letters is odd.
- Turn the cube back to white on top and green in front, put on the blindfold.
- Execute the edge letters one by one: setup, T-perm, undo. Say to yourself in your head the letter you are doing.
- With an odd number of letters - Ra-perm.
- Execute the corner letters: setup, modified Y-perm, undo.
- Stop the timer and take off the blindfold.
The first attempts often end in a DNF - that's normal. When the cube is not solved, look at what is wrong and check it in the “Common problems” section. At the start the whole solve takes 5-15 minutes, and after a few weeks of regular practice many people get under 2-3 minutes.
Tracing practice
A random scramble for practising just the tracing. Look at the cube (you can rotate it) or the net, type in the edge and corner letters and click “Check”. The check executes your letters on the cube, so it will also accept a different choice at a cycle break than the one in the example. “Show letters on stickers” is a hint to get you started.
Cheat sheet: letters and setups
All the setups from both tables on one sheet, together with the letter net and the three algorithms.
Printable cheat sheet (A4 / PDF)
- Tracing - edges from buffer UR (B), corners from buffer UBL (A). The letter of the sticker in the buffer, then the letter in its position, and so on; cycle break - any unsolved piece.
- Edges - setup to D, R U R' U' R' F R2 U' R' U' R U R' F', undo.
- Parity - odd number of edge letters: R U R' F' R U2 R' U2 R' F R U R U2 R' U' before the corners.
- Corners - setup to P, R U' R' U' R U R' F' R U R' U' R' F R, undo.
Solve it yourself blindfolded
The clock starts from the scramble, just like at a competition. Once you have memorised the letters, click “Cover eyes” - the cube turns grey and you solve from memory with the buttons or the keyboard (l and d are only on the buttons: l = L together with M, d = D together with E). At the end, “Uncover and check” shows the result together with the memorisation and execution times. You can also practise only the edges or only the corners.
Drag a sticker with your finger or mouse to turn a layer, or drag outside the cube to rotate the view. Keyboard: R, L, U, D, F, B, with Shift for the opposite direction; X, Y, Z rotate the whole cube.
Common problems
At the end two edges and two corners are swapped
This is almost always forgotten parity (or parity done although the number of letters was even). Count the edge letters again - with an odd number, Ra-perm is mandatory.
One or two edges are flipped, corners twisted
During tracing the wrong sticker of the same piece was read (e.g. C instead of I - that is the same UF edge). The piece then ended up in its position, but flipped. Check which sticker you are reading: always the one sitting in the position you have just reached.
Three pieces are cycled around
One letter was skipped or added. Most often at a cycle break: we forget to note the letter at its end (the return to the piece the cycle break started from).
Everything fell apart
That is usually an execution error: a move in the wrong direction, a badly undone setup or a rotation of the whole cube. Go back to the “eyes open” step and check after each letter that the buffer holds the next letter of the memo. Also make sure the cube doesn't lock up - a layer that isn't turned all the way can pop over on the next move.
I lose track of which letter I'm doing
Say the letter in your head before the setup and tick off the pairs of the story. If you get lost, don't guess - after a wrong letter the cube will be a DNF anyway. It's better to start the attempt again and slow down.
I mix up edge and corner letters
Memorise them separately: edges as a story of images, corners as a rhythm or a separate story. You always execute all the edges first and then all the corners, so they never get mixed during the solve.
What next?
Once Old Pochmann works reliably, you can speed up. First the memorisation: fixed images for letter pairs make it several times shorter. Then the execution: edges with the M2 method (short middle-layer moves instead of T-perm, far fewer moves), and finally commutators (3-style), with which the best competitors solve the whole cube blindfolded in a dozen or so seconds.
WCA competitions also have the 4x4 and 5x5 blindfolded events and Multi-Blind: you memorise several cubes at once and solve them all blindfolded. They all use the same letters and the same tracing. How to start Multi-Blind is described in the 3x3 Multi-Blind course, and 4x4 in the 4x4 blindfolded course.
Useful for blindfolded solving
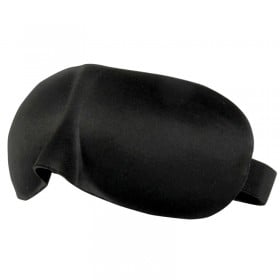
A blindfold you can't see through and a cube that doesn't pop or skip - with your eyes covered you won't notice that a layer hasn't turned all the way.


Other courses
- 2x2x2 Cube How to Solve a 2x2 Cube - Step-by-Step Course The simplest way to solve the 2x2 cube: white layer, yellow face and corners into place. 3 algorithms are enough - you know two of them from the 3x3 course. Go to the course
- 3x3x3 Cube How to Solve a Rubik's Cube 3x3 - Step-by-Step Course The layer-by-layer method from scratch: daisy, white cross, the first two layers and the last layer. Every move on an animated cube. Go to the course
- 4x4x4 Cube How to Solve a 4x4 Cube - Step-by-Step Course The 4x4 cube with the reduction method: you solve the centres and pair up the edges, then finish it like a 3x3. Plus 4 new algorithms, including two parities. Go to the course
- 5x5x5 Cube How to Solve a 5x5 Cube - Step-by-Step Course The 5x5 cube with the reduction method: you solve the centres and pair up the edges, then finish it like a 3x3. The face colours are set by the centres, and at most one parity awaits you at the end. Go to the course
- 6x6x6 Cube How to Solve a 6x6 Cube - Step-by-Step Course The 6x6 cube with the reduction method for those who already know the 4x4 and 5x5: four kinds of centre pieces, edges made of four wings, and parities. We focus on what is new. Go to the course
- 7x7x7 Cube How to Solve a 7x7 Cube - Step-by-Step Course The 7x7 cube with the reduction method for those who already know the 5x5: six types of centre pieces, edges made of five pieces and two edge parities. At the end, rules for the 9x9 and bigger. Go to the course
- Pyraminx How to Solve a Pyraminx - Step-by-Step Course The pyramid in 4 stages: tips, centres, bottom layer and the last three edges. 3 short algorithms are enough - it is the easiest puzzle of the whole family. Go to the course
- Megaminx How to Solve a Megaminx - Step-by-Step Course A dodecahedron with 12 faces is solved like a 3x3 cube, it just takes longer: layer by layer, with the same algorithms. The course guides you through every step, including the middle belt, where most people get lost. Go to the course
- Skewb How to Solve a Skewb - Step-by-Step Course The cube that turns along its diagonals: the white face from an insertion table, then the bottom corners and the centres. Four short algorithms. Go to the course
- Square-1 How to Solve a Square-1 - Step-by-Step Course A puzzle that changes shape. First you will learn to bring it back to a cube shape (with clear rules instead of guessing), and then solve the colours layer by layer - parity included. Go to the course
- FTO How to Solve the FTO - Step-by-Step Course An octahedron that becomes an official WCA event in 2027. Edges first, then corners, triangles at the end - six short algorithms. Go to the course
- Clock How to Solve a Clock - Step-by-Step Course A puzzle with 18 clocks, 4 pins and 4 wheels. There are no algorithms to memorise here - three rules are enough, and the whole solve takes a dozen or so moves. Go to the course
- 3x3x3 One-Handed How to Solve a 3x3 Cube One-Handed - Step-by-Step Course What the One-Handed event is about, which hand to use, how to hold the cube, which moves to replace and how to practise. A timer with inspection and average of 5. Go to the course
- 3x3x3 Fewest Moves How to Solve a 3x3 Cube in the Fewest Moves - Step-by-Step Course Solve the cube in as few moves as possible: WCA rules, move counting, blocks, skeleton, insertions and inverse scramble. Solution checking just like a judge. Go to the course
- 3x3x3 Multi-Blind How to Solve Multiple 3x3 Cubes Blindfolded - Step-by-Step Multi-Blind Course Several cubes memorised at once and solved blindfolded: WCA rules, points, how many cubes to declare, memory palace and a timed attempt. Go to the course
- 4x4x4 Blindfolded How to Solve a 4x4 Cube Blindfolded - Step-by-Step Course For those who already solve 3x3 blindfolded: centres with U2, wings with r2, corners as in 3x3 and parities. Tables with animations and a trainer. Go to the course
- 5x5x5 Blindfolded How to Solve a 5x5 Cube Blindfolded - Step-by-Step Course For those who already solve 4x4 blindfolded: x-centres and t-centres with U2, corners, wings with r2 and midges with M2. Tables with animations and a trainer. Go to the course