


Before you start
3x3 Multi-Blind (MBLD for short, sometimes just “multi”) is an official WCA event. You get several scrambled 3x3 cubes - as many as you declare yourself. Within one shared time you memorise all of them, put on the blindfold and solve them one after another from memory. Your placing is decided first of all by points: every solved cube gives you a point, and every unsolved one takes a point away. Time only matters when the number of points is equal.
What you need to know
- how to solve a 3x3 cube blindfolded with any method - if you can't yet, start with the 3x3 blindfolded course (letters, tracing and the Old Pochmann method),
- how to do it reliably: it's good if most of your single-cube attempts succeed. In Multi-Blind every mistake costs points.
The solving method stays the same. Three things are new: a memory that holds several cubes for tens of minutes, a plan for the attempt and the decision how many cubes to declare. That is what this course is about.
What it looks like at a competition
An attempt takes a long time - up to 60 minutes - so Multi-Blind usually has its own slot in the competition schedule, often with one attempt for each competitor. The world record is 63 solved cubes out of 65 in 58:23, and the Polish record is 60 out of 64 in 60:04 (as of October 2026). To start with, 2 cubes are enough: a 2/2 result is a fully valid result in the WCA rankings.
Cubes
You need as many 3x3 cubes as you want to solve, and you bring them yourself. They can be different models, but none of them may have a logo - in regular 3x3 blindfolded a logo is allowed, in Multi-Blind it isn't (3l). They also must not have markings or damage that would let you tell the pieces apart (3j). We hold them as in the blindfolded course: with the white centre on top and green in front.
1Event rules
Goal: you know how a Multi-Blind attempt goes at a competition and what leads to a penalty or a DNF.
Multi-Blind is described in Article H of the WCA Regulations. Beyond that, the rules for regular blindfolded solving apply (Article B). The numbers in brackets are regulation numbers.
How an attempt goes
- Declaring. Before the attempt you give the organisers the number of cubes - at least 2 (H1a). Once declared, it can't be changed (H1a1). You can ask for your number to be kept secret until everyone has declared (H1a2).
- Scrambling. Each cube gets a different scramble, and the scrambler checks that none of them is repeated (4g2). The cubes stand on the table covered, in any orientation, arranged as close to a square as possible and never one on top of another (H1a3).
- Start. There is no inspection (B1a). When the judge gives the signal, you have one minute to start (B2a). You start the timer by lifting your fingers from it, and only then remove the covers (B2d, B2d1).
- Memorisation. You may pick up the cubes and rotate them as a whole (B3a), but you may not turn the layers (B3c) or write anything down (B3b).
- Blindfold. You put on the blindfold (B4a). Until you make the first move, you may take it off and go back to memorising (B4a1). From the first move you may no longer look at any cube (B4d) - which is why you memorise all the cubes before putting on the blindfold. The judge places a sheet between your face and the cubes (B4c).
- Solving. You solve the cubes one by one, in any order.
- End. You release the cube and stop the timer (B5a). You can finish at any moment, even when not all the cubes are solved (H1b1). You may take off the blindfold before stopping the timer, but then you must not touch the cubes any more (B5c).
- Result. The judge checks each cube and records the result in the form “solved/attempted time”, e.g. 3/5 40:30 (9f2+).
Time limit
The limit depends on the number of declared cubes: 10 minutes per cube, but no more than 60 minutes (H1b).
| Cubes | Limit |
|---|---|
| 2 | 20 minutes |
| 3 | 30 minutes |
| 4 | 40 minutes |
| 5 | 50 minutes |
| 6 or more | 60 minutes |
In other events exceeding the limit means a DNF. In Multi-Blind it's different: when the limit is reached, the judge stops the attempt, and the cubes solved up to that moment count. The limit is then recorded as the time (H1b1).
Penalties
| Situation | Penalty | Regulation |
|---|---|---|
| cube solved, but one layer misaligned by more than 45° | +2 s to the total time for each such cube | 10e3, 10f1, H1d |
| cube that needs more than one move to be solved | cube unsolved | 10e4 |
| a move on a cube during memorisation | DNF for the whole attempt or - at the Delegate's discretion - that cube counted as unsolved | B3c, H1e |
| notes during memorisation | DNF | B3b |
| looking at the cubes after the first move in the blindfold | DNF | B4d |
| touching a cube after removing the blindfold, before stopping the timer | DNF | B5c |
| starting the timer while touching the cubes or the covers | +2 s | B2c |
A Multi-Blind round has one, two or three attempts, and the best one counts (9b5). You'll find out how many on the competition website. If you are late for your attempt time, the judge may consider that you are giving up the attempt (2u1).
2Points and result
Goal: you can work out the points for any attempt and know when a result is valid.
Points are the number of solved cubes minus the number of unsolved ones (9f12c). The result is invalid (DNF) when there are fewer than 0 points or when only one cube is solved. Zero points with at least two solved cubes is a valid result.
| Result | Points | Does it count |
|---|---|---|
| 2/2 | 2 | yes |
| 1/2 | 0 | DNF - only one cube solved |
| 2/3 | 1 | yes |
| 3/4 | 2 | yes |
| 2/4 | 0 | yes |
| 3/7 | -1 | DNF - fewer than 0 points |
| 8/10 | 6 | yes |
Who ranks higher
- More points.
- With equal points - the shorter time.
- With equal points and time - fewer unsolved cubes.
For example, 2/2 in 15:00 and 3/4 in 35:00 both have 2 points, so the faster 2/2 ranks higher. The time is recorded in whole seconds, with the fraction truncated (9f2): 40:30.97 becomes 40:30. The +2 s penalties for cubes with a misaligned layer are added to the time (H1d), so the result can exceed the limit - as in the Polish record of 60/64 in 60:04.
Calculator
Enter the result of an attempt, and the calculator will count the points, check whether the result counts and show the time limit for that number of cubes.
3How many cubes to declare
Goal: you can match the number of cubes to your success rate and your time.
Every cube that fails costs two points compared with a solved one: instead of +1 you get -1. So an extra cube only pays off if you solve it more often than you mess it up. However, what matters is not just the number of points, but also whether the result counts at all.
Two cubes is the biggest risk
With 2 cubes, one mistake means a DNF (1/2). With 3 cubes, one mistake still gives 2/3, i.e. 1 point. That is why, at the same success rate, the chance of a valid result often goes up when you declare a few more cubes. Enter how often you manage to solve a single cube, and the table will show the odds for different numbers of cubes:
The table assumes that every cube succeeds equally often. In a real attempt that's not the case: the more cubes, the more there is to memorise, the longer the attempt and the greater the fatigue, so the success rate drops. That's why you should enter the success rate from practice Multi-Blind attempts at home, not from single solves.
Time
- Measure at home how long a whole 2-cube attempt takes you (the timer in stage 7 records memorisation and solving separately). With more cubes the time per cube usually goes up, because reviews of the earlier cubes are added.
- Up to 5 cubes you have 10 minutes per cube. From 6 cubes the limit stays at 60 minutes, so each cube gets less and less: with 10 cubes, 6 minutes.
- Leave a margin. At a competition there's stress and an unfamiliar place, and every minute past the limit means cubes that don't count.
A simple rule to start with
Declare as many cubes as you solve at home in most attempts, and with a few minutes to spare before the limit. At your first competitions 2 or 3 cubes is a good choice. Increase the number by one when several attempts in a row succeed.
4Memory for several cubes
Goal: you have a way to remember several cubes for the whole attempt.
With one cube you only need to remember the letters for a few minutes: you repeat them in your head or build a short story from them, as in stage 8 of the blindfolded course. In Multi-Blind you memorise the first cube right at the beginning, but you only solve it after memorising all the others - even tens of minutes later. Letters repeated in your head won't last that long. You need two things: images and locations.
Images for letter pairs
One cube is usually about 20 letters (about 12 edges and 8 corners), i.e. about 10 pairs. Each letter pair turns into an image: KR - kart, ST - stool, PA - parrot. In Multi-Blind it's worth having fixed images for all pairs, written down once in a list and reviewed. When you have to come up with new associations during an attempt, you lose time, and a freshly invented image is easier to forget.
- An image should be concrete and easy to picture: an object, an animal, a person. Abstract words (“calm”, “theory”) don't stick well.
- Images must be clearly different from each other. If CT is a cat and KT is a kitten, it's easy to mix them up in a hurry - then it's better to change KT into, say, a kettle.
- You don't need all the pairs straight away. Start with the ones that come up in your solves and keep adding more.
Memory palace
The images need to be “put down” somewhere in a fixed order. This is what a memory palace (the method of loci) is for: a route you know by heart, e.g. your home, the way to school or work. Along the route you pick fixed points (loci) in a fixed order: the front door, the coat rack, the mirror, the shoe cabinet…
- At each point you leave two images that interact with each other: a kart crashes into a stool by the front door. So one point is four letters, and one cube is about 5 points.
- Each cube has its own stretch of the route: cube 1 - the hallway, cube 2 - the kitchen, cube 3 - the living room. When solving, you walk the route again and read the images in order.
- In each stretch, edges first, then corners - the same order in which you solve them. When the number of edge letters is odd, the last one is left alone: put it at a separate point or give it a fixed image that reminds you of parity.
- Prepare 2-3 different routes and use them in rotation. Images from a previous attempt on the same route can come back and get mixed up with the new ones.
Reviews
After memorising each new cube, quickly go over the stretches of the earlier cubes in your head. Reviews cost time, but without them the first cubes fade from memory before you get back to them. Before putting on the blindfold, walk the whole route once more. You'll find out how often to review in practice attempts at home: if you forget the first cubes, review more often.
The last cube - a trick for later
You solve the last cube right after putting on the blindfold, so you can memorise it the way you do in regular blindfolded - briefly, with just the letters - and solve it first. Then you solve the remaining cubes starting from the first one, from the memory palace. This saves time, but to begin with solve all the cubes the same way, in the same order in which you memorise them.
5The attempt step by step
Goal: you have a plan for the whole attempt and don't mix up the cubes.
Order and orientation of the cubes
With the blindfold on, you can't see which cube is which or how it is oriented. So you have to settle everything before you put on the blindfold:
- A fixed order. Memorise the cubes in the same order in which you will solve them - e.g. left to right, row by row. The organisers set out the cubes, but during memorisation you can rearrange them and pick them up.
- A fixed orientation. After memorising, put the cube back in its place with white on top and green facing you. In the blindfold you'll pick it up in the same orientation and start the first letter straight away.
- Solved ones aside. Put a solved cube in a different, agreed place, e.g. further away from you. Then in the blindfold you won't pick up the same cube a second time by mistake.
The procedure
- Before the start: check the blindfold, recall the route and the order of the cubes.
- Start the timer and remove the covers.
- Take cube 1, orient it with white on top and green in front. Trace the edges and corners, turn the letters into images and place them along its stretch of the route. Put the cube back in its place in the same orientation.
- Memorise the next cubes in the same way. Every cube or two, do a quick review of the earlier ones.
- Go over the whole route and put on the blindfold.
- Take cube 1. Walk its stretch of the route and execute the letters: edges, parity if needed, corners. At the end check with your fingers that all the layers are aligned, and set the cube aside.
- Solve the next cubes in the same way.
- When you can't remember a cube, don't stop for long. Move on to the next one, and come back to the forgotten one at the end if there's time left.
- After the last cube, release it and stop the timer.
With the blindfold on you can't see the clock, and when the limit is reached the judge will stop the attempt. That's why at a competition you should declare as many cubes as you can fit within the limit at home with time to spare (stage 3).
6How to learn
Goal: you have a practice plan from your first route to your first competition.
The plan
- Reliable blindfolded solving. Before you start Multi-Blind, do a few dozen single blindfolded solves. Most attempts should succeed.
- A list of images. Write down images for letter pairs and review them every day, a dozen or so new ones at a time. Test yourself: letters → image and image → letters.
- Your first route. Choose a route with about 10-15 points and walk it in your head several times until the order is obvious.
- Long-memory test. Memorise one cube on the route, put it down, do something else for 10-15 minutes and only then solve it blindfolded. If it works, your memory is ready for Multi-Blind.
- Two cubes. A full 2-cube attempt with a 20-minute limit (stage 7). Repeat until most attempts end 2/2.
- More cubes. Add one cube at a time and a second route. Increase the number of cubes only when the current one works reliably.
Learn from your mistakes
After each attempt, check why a cube failed. The timer in stage 7 shows the letters of each cube, so you can compare them with what you have in memory. There are usually four causes:
- memory - a forgotten or mixed-up image: more reviews, clearer images, better points on the route,
- tracing - a wrong letter already during memorisation: practise tracing in the trainer from the blindfolded course,
- execution - a wrong move, a wrong setup or a skipped letter: slow down, say the letter you're doing in your head,
- the cube - a layer popped or locked up: the cube needs a check, lubrication or replacement.
Good habits
- Practise in conditions close to a competition: the same blindfold, a mat, cubes laid out like on the judge's table, no breaks during the attempt.
- Use cubes you know well and that don't pop or skip. With several cubes, one locked-up layer means lost points.
- A full attempt with many cubes is tiring. A few good attempts a week are better than a rushed attempt every day.
- When you're aiming for more cubes, first speed up memorisation (fixed images, less hesitation), and then solving (faster methods - see “What next?”).
7Your first 2-cube attempt
Goal: you have your first Multi-Blind result, timed like at a competition.
The timer runs the attempt like at a competition: it generates scrambles, measures time from the start, watches the limit and at the end counts the points according to the regulations.
- Choose the number of cubes and click “Generate scrambles”. Scramble the real cubes with white on top and green in front and set them out in order. Ideally someone else should scramble them - if you do it yourself, don't look closely at the cubes.
- Click “Start” - the time and memorisation begin. The scrambles disappear from the screen.
- When you put on the blindfold, click “Blindfold on” (or press space) - the timer records the memorisation time.
- After the last cube, click “Stop” or press space. When the limit is reached, the timer stops by itself.
- Mark which cubes are solved. Next to each cube you'll see the letters from its scramble - compare them with what you have in memory.
Results are saved only in this browser. The letters are computed the same way as in the blindfolded course (Old Pochmann, buffers UR and UBL), and underlined letters are cycle breaks. If you trace with a different method or break cycles differently, your letters may differ, and the cube may still be memorised correctly.
Cheat sheet
The most important rules and the attempt plan on one sheet.
Printable cheat sheet (A4 / PDF)
- Rules - at least 2 cubes, the number can't be changed. No inspection, time runs from the start. You memorise all the cubes before the blindfold, with no notes and no moves. Cubes without logos.
- Limit - 10 minutes per cube, 60 at most. After the limit, the cubes solved up to that moment count.
- Points - solved minus unsolved. Fewer than 0 or only 1 solved = DNF. With equal points, the shorter time wins.
- How many cubes - as many as you solve at home in most attempts, with time to spare. 2 cubes: one mistake = DNF.
- Memory - fixed images for letter pairs, memory palace: 2 images per point, each cube on its own stretch of the route, reviews every one or two cubes.
- Cubes - fixed order, put down with white on top and green facing you, solved ones set aside.
Practise in the simulator
Multi-Blind is practised on real cubes, but the simulator is useful for a memory test on a single cube. Scramble, memorise the cube on your route and click “Cover eyes”. Do something else for a few minutes, then solve the cube from memory with the buttons or the keyboard (l and d are only on the buttons: l = L together with M, d = D together with E). “Uncover and check” shows the result.
Drag a sticker with your finger or mouse to turn a layer, or drag outside the cube to rotate the view. Keyboard: R, L, U, D, F, B, with Shift for the opposite direction; X, Y, Z rotate the whole cube.
Common problems
I forget the first cubes
You review them too rarely or the images are too weak. Do a short review after every cube, and make the images do something at the point on the route - movement and strange combinations are remembered better than an object that is just standing there.
Images from the previous attempt get mixed up with new ones
You use the same route too often. Switch routes between attempts, and after an attempt on a given route let it rest for a few hours.
In the blindfold I don't know which cube is which
Settle on a fixed order before the start and stick to it. Put solved cubes in a different place, and leave unsolved ones where they were.
The cube is almost solved - two edges swapped or a twisted corner
That's usually a skipped letter, a wrong letter during tracing or forgotten parity. Compare your letters with the letters the timer shows after the attempt. If the letters match, the mistake was in the execution.
The cube was solved, but the judge gave +2
One layer was misaligned by more than 45°. After the last letter of each cube, check with your fingers that all the layers are straight.
I don't fit within the limit
You're declaring too many cubes for your pace. Reduce the number or speed up memorisation - that's usually where most of the hesitation is. Check in the timer how much time memorisation takes you and how much solving.
One cube solved out of two, and the result is a DNF
That's what the regulations say: with one solved cube the result doesn't count, even if the points are 0. With 3 cubes, one mistake still gives a valid 2/3.
What next?
When attempts with several cubes work reliably, you can increase their number. Then pace becomes more and more important: the faster you memorise and solve one cube, the more cubes you'll fit into 60 minutes. Old Pochmann is about 350-400 moves per cube. Edges with the M2 method and commutators (3-style) need far fewer moves - they are used by competitors who solve dozens of cubes in an hour.
The best test is a competition: Multi-Blind is held at some WCA competitions in Poland. You'll find the attempt time and the number of attempts in the schedule on the competition website, and the number of cubes is usually declared to the organisers before the round starts.
Useful for Multi-Blind
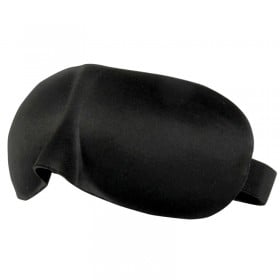
A blindfold you can't see through and several cubes that don't pop or skip - with several cubes, one locked-up layer costs you points.


Other courses
- 2x2x2 Cube How to Solve a 2x2 Cube - Step-by-Step Course The simplest way to solve the 2x2 cube: white layer, yellow face and corners into place. 3 algorithms are enough - you know two of them from the 3x3 course. Go to the course
- 3x3x3 Cube How to Solve a Rubik's Cube 3x3 - Step-by-Step Course The layer-by-layer method from scratch: daisy, white cross, the first two layers and the last layer. Every move on an animated cube. Go to the course
- 4x4x4 Cube How to Solve a 4x4 Cube - Step-by-Step Course The 4x4 cube with the reduction method: you solve the centres and pair up the edges, then finish it like a 3x3. Plus 4 new algorithms, including two parities. Go to the course
- 5x5x5 Cube How to Solve a 5x5 Cube - Step-by-Step Course The 5x5 cube with the reduction method: you solve the centres and pair up the edges, then finish it like a 3x3. The face colours are set by the centres, and at most one parity awaits you at the end. Go to the course
- 6x6x6 Cube How to Solve a 6x6 Cube - Step-by-Step Course The 6x6 cube with the reduction method for those who already know the 4x4 and 5x5: four kinds of centre pieces, edges made of four wings, and parities. We focus on what is new. Go to the course
- 7x7x7 Cube How to Solve a 7x7 Cube - Step-by-Step Course The 7x7 cube with the reduction method for those who already know the 5x5: six types of centre pieces, edges made of five pieces and two edge parities. At the end, rules for the 9x9 and bigger. Go to the course
- Pyraminx How to Solve a Pyraminx - Step-by-Step Course The pyramid in 4 stages: tips, centres, bottom layer and the last three edges. 3 short algorithms are enough - it is the easiest puzzle of the whole family. Go to the course
- Megaminx How to Solve a Megaminx - Step-by-Step Course A dodecahedron with 12 faces is solved like a 3x3 cube, it just takes longer: layer by layer, with the same algorithms. The course guides you through every step, including the middle belt, where most people get lost. Go to the course
- Skewb How to Solve a Skewb - Step-by-Step Course The cube that turns along its diagonals: the white face from an insertion table, then the bottom corners and the centres. Four short algorithms. Go to the course
- Square-1 How to Solve a Square-1 - Step-by-Step Course A puzzle that changes shape. First you will learn to bring it back to a cube shape (with clear rules instead of guessing), and then solve the colours layer by layer - parity included. Go to the course
- FTO How to Solve the FTO - Step-by-Step Course An octahedron that becomes an official WCA event in 2027. Edges first, then corners, triangles at the end - six short algorithms. Go to the course
- Clock How to Solve a Clock - Step-by-Step Course A puzzle with 18 clocks, 4 pins and 4 wheels. There are no algorithms to memorise here - three rules are enough, and the whole solve takes a dozen or so moves. Go to the course
- 3x3x3 One-Handed How to Solve a 3x3 Cube One-Handed - Step-by-Step Course What the One-Handed event is about, which hand to use, how to hold the cube, which moves to replace and how to practise. A timer with inspection and average of 5. Go to the course
- 3x3x3 Fewest Moves How to Solve a 3x3 Cube in the Fewest Moves - Step-by-Step Course Solve the cube in as few moves as possible: WCA rules, move counting, blocks, skeleton, insertions and inverse scramble. Solution checking just like a judge. Go to the course
- 3x3x3 Blindfolded How to Solve a Rubik's Cube 3x3 Blindfolded - Step-by-Step Course Solve the cube with your eyes covered using Old Pochmann: letters on the stickers, tracing edges and corners, 3 algorithms and memorisation practice. Go to the course
- 4x4x4 Blindfolded How to Solve a 4x4 Cube Blindfolded - Step-by-Step Course For those who already solve 3x3 blindfolded: centres with U2, wings with r2, corners as in 3x3 and parities. Tables with animations and a trainer. Go to the course
- 5x5x5 Blindfolded How to Solve a 5x5 Cube Blindfolded - Step-by-Step Course For those who already solve 4x4 blindfolded: x-centres and t-centres with U2, corners, wings with r2 and midges with M2. Tables with animations and a trainer. Go to the course